Setting Up a Simple Home Network
Using Windows ME
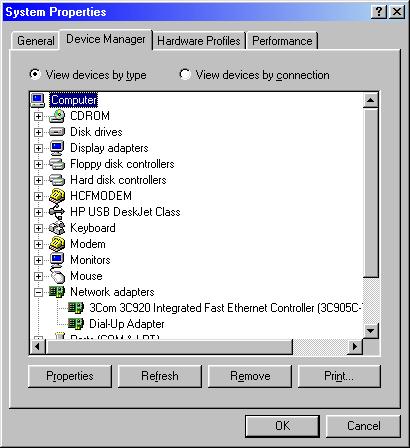
The task of setting up a home network is greatly simplified through the use of Windows ME on at least one of the computers in the network. Before beginning the setup of the network software it will be necessary to make sure there is a Network Interface Card, or NIC, installed in each of the computers to be networked. In the case of a desktop or tower PC the NIC will have a point of connection on the back of the computer. It will appear very similar to a modem, except it will have only one space in which to insert a plug instead of two, and that space, while the same shape, will be noticeably larger than the modem telephone jacks. In the case of a laptop computer, some will have a connecting point for a network cable which looks just like a standard NIC card jack, others will not have a built-in interface, but will need a PCMCIA NIC installed. The current choices for network speeds are either 10 MBPS or 100 MBPS. Most current NIC cards are of a dual, 10/100 variety. In order to determine that the card is installed and functioning properly, you can check the "System" icon in Control Panel. Click on the plus sign next to "Network Adapters", highlight the listing of the NIC card, and click on "Properties". See Figure 1. "Properties" should state that the device is working properly.
Figure 1
In this case, the NIC card is a 3Com 3C920.
In the event that a NIC card has not been installed in the computer, if you are running at least Windows 98 SE the actual installation should involve no more than opening up the computer and plugging the NIC into an open PCI or ISA socket, whichever is appropriate for the card. In the case of a laptop, simply plug in the PCMCIA card. Windows 98 SE will automatically recognize and ask you if you want it to install the drivers for you. Answer Yes to any questions it asks or choose the default drivers it recommends, and restart the computer if it asks you to do so.
After the initial steps of installing network cards all of the computers should be connected to each other, either by a crossover cord (in the case of a two-computer network) or by a straight Cat 5 cable connecting each machine to a hub. Then you must run the built-in Home Networking Wizard on whichever computer is running Windows ME. You will find the wizard in your Accessories menu, as shown in the following illustration.
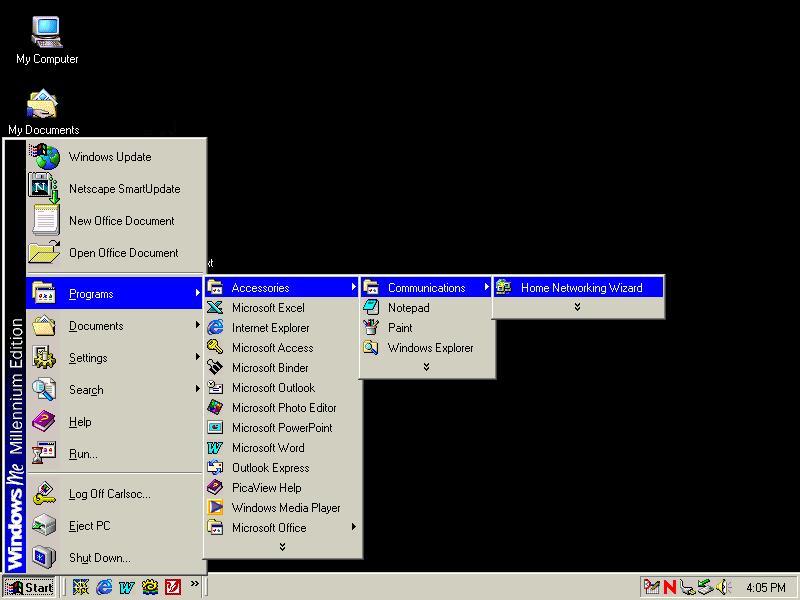
Figure 2
The Wizard is quite straightforward and is pretty easy to follow. You will navigate your way through the screens in the order shown in the following illustrations. Notes about each of the steps will be included beneath the illustrations.
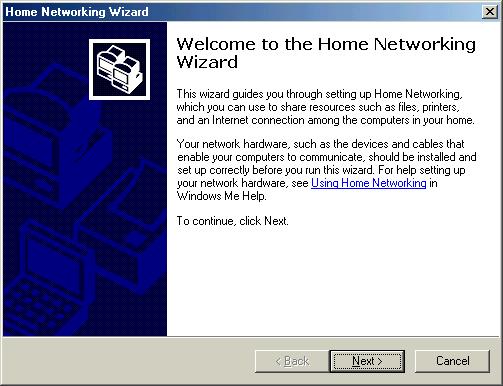
Figure 3
This is the initial screen which appears after first opening the Wizard. Click Next.
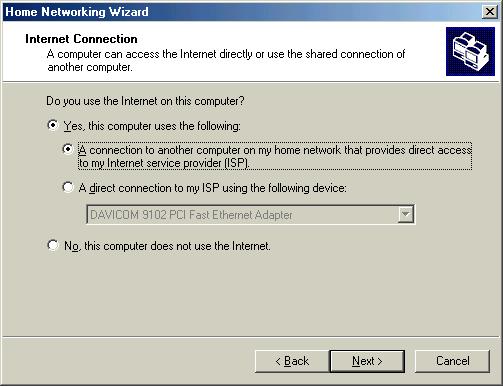
Figure 4
If this computer will be used for internet browsing but is NOT the one with the internet connection (modem, Cable, or DSL) you will place the dots as shown above. If this computer will not be used for internet browsing, place the dot in the last circle, titled "No, this computer does not use the internet."
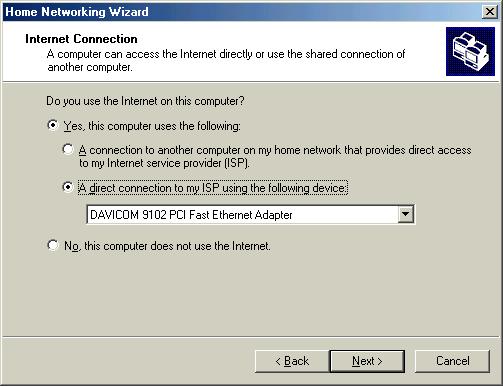
Figure 5
This is the same screen, but with choices made to use this computer as the internet connection. Your particular connecting device will be different, depending on the type of connection and the path you normally take to the internet. If you have a modem connection, the modem will be listed in the drop-down menu which here shows DAVICOM. Click on the arrow at the right of that space to reveal your choices. It will show both your modem and the NIC card you are going to use for your network connection. In some cases it will show an additional NIC card, which would be typical of a computer using a high-speed internet connection such as a cable modem or DSL. If you have such a connection, that would be your selection here. After making your selections on this screen, click "Next".
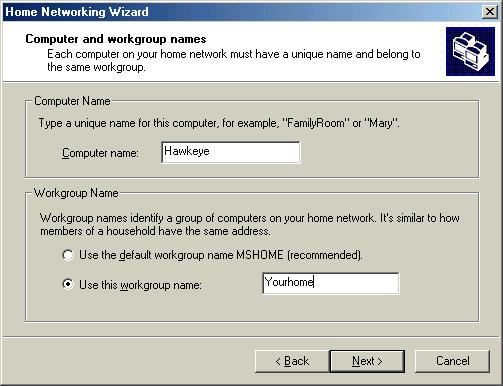
Figure 6
On this screen you will make some choices about your network. Each computer needs its own name. It can be any name you choose, and it will always be referred to on the network by that name. Here the name is shown as "Hawkeye". You will type in your chosen name in that space. Then you must enter your workgroup name. By default, Windows sets the workgroup as MSHOME and the corresponding circle is marked. I recommend that you choose your own workgroup name. That again can be any name of your choosing, but must be entered exactly the same way on all computers on your network. Here the illustrated computer is in a workgroup named Yourhome. After you've made your selection, click on "Next".
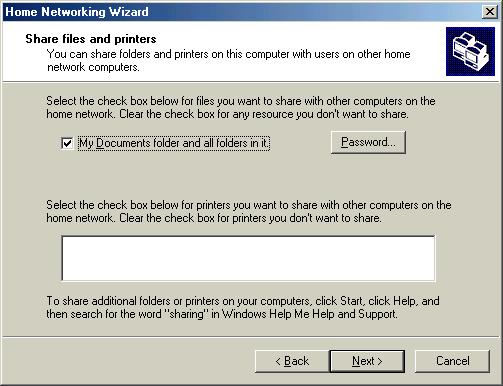
Figure 7
Here you make choices about sharing the resources on this computer. This is why you are networking the computers in the first place. Click the box next to My Documents… to share that folder and then click on the Password box if you would like to have password protection on it. That means that, while the other computers on your network can share the folder, the users of those computers must know the assigned password. The next illustration is of the Password selection screen.
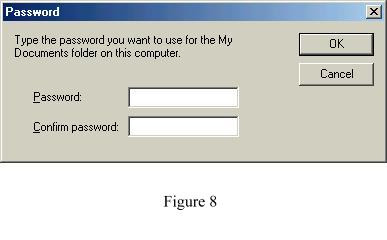
We will deal with the sharing of the rest of the hard drive later. If you have a printer already hooked up to this computer, it will show up in the large box in the lower half of the window. The illustrated computer had no printer. If you want to enable the other computers on your network to use your printer, select the check box next to the printer. Be aware that each of the computers on the network that will be using the printer must have the printer installed on them as it is on the computer to which it is connected. You should have the installation software that came with your printer. Use that to install the printer on the other computers after your network is completed. Note the instructions shown here and on your computer for sharing additional folders. Again, we'll cover this topic later. When finished with this window, click "Next".
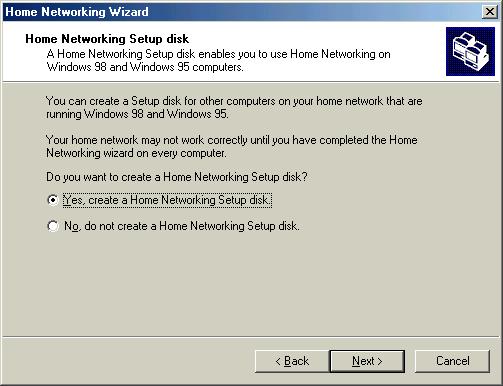
Figure 9
If you are running Windows ME on all of the other computers to be networked you do not need to create a Home Networking Setup Disk. If any of the computers has any earlier version of Windows, you will need a disk. The Home Networking Wizard appears only on Windows ME or newer versions of Windows, such as XP. The disk you create in this step will copy both the necessary settings from this computer as well as the entire Wizard. When you run the Execute file on the disk you create here on the older computers, it places a Home Networking Wizard into the earlier versions of Windows. That way you only have to run the disk once on each of the non-ME machines. In order to create the disk, check the "Yes" circle and click Next. Follow the instructions on succeeding screens. If you don't need to create the disk, highlight the "No" circle and click Next.
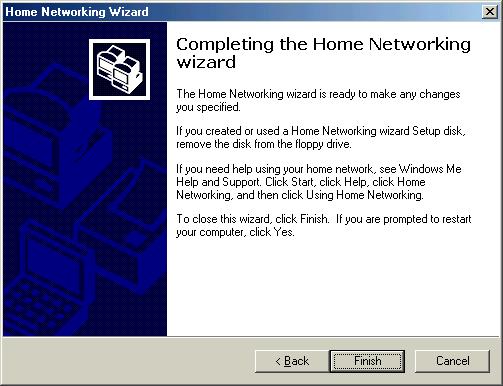
Figure 10
This is the last Wizard screen you will get for now. Click Finish, then restart the computer when prompted. After the computer restarts, you will see this screen:
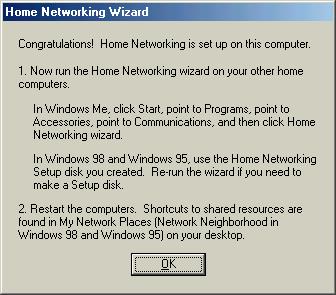
Figure 11
Note that it instructs you how to continue with the network installation on the other computers. After completing the installations on all of the computers, you must restart all of them. I find it helpful to start my main computer first (the one that is connected to the internet and has the printer attached) but it really doesn't matter what the order is.
A Troublesome Password Window
When you restart each of the computers, chances are that you will get a window to enter your password for Microsoft Networks. Don't bother to enter a password, because we're going to make a little change on each of the computers to avoid this. Start by clicking on your Start button, then Settings, then Control Panel. You should see a window like the following:
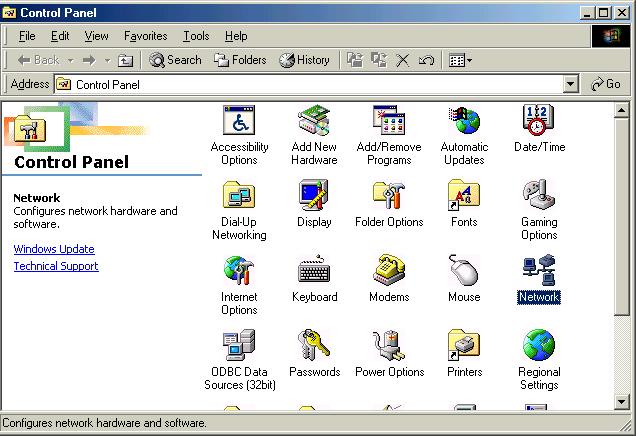
Figure 12
Here the Network icon is highlighted. Your window may appear differently, if it is not set to show large icons, but the one you want to double-click on is the Network icon in either case. Double-click on that icon to get a window like this:
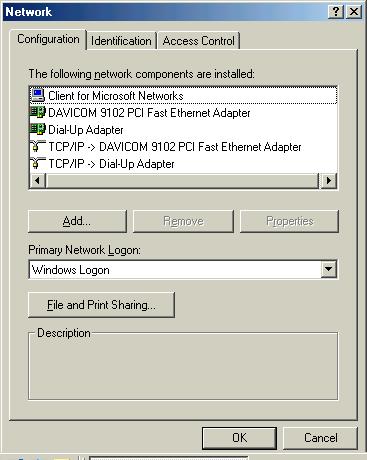
Figure 13
In the center of the window is a box headed "Primary Network Logon". If you're consistently being asked for a password, that window probably says "Client for Microsoft Networks". Using the arrow at the right of the box, select "Windows Logon" as is shown here. Click OK and you will be prompted to restart the computer. Do so. You will get a password window one more time, but this time it will say "If you do not enter a password you won't see this window again." So do exactly that…don't enter a password and do click OK. You will have no more problems with password windows at startup.
Sharing the rest of your folders
Next we'll discuss how to set up the sharing of other folders on your computers. Each computer must have its folders shared if they are to be accessible to the other computers. Within the Home Networking Wizard you set only the "My Documents" folders to be shared. In order to make the entire contents of the hard drive on a computer available to the other computers do the following:

Sorry…construction zone!