Ford Super Duty
Door Courtesy Lights
2004 F250 4x4 XLT Sport Crew Cab
Click Here for a PDF version of this article
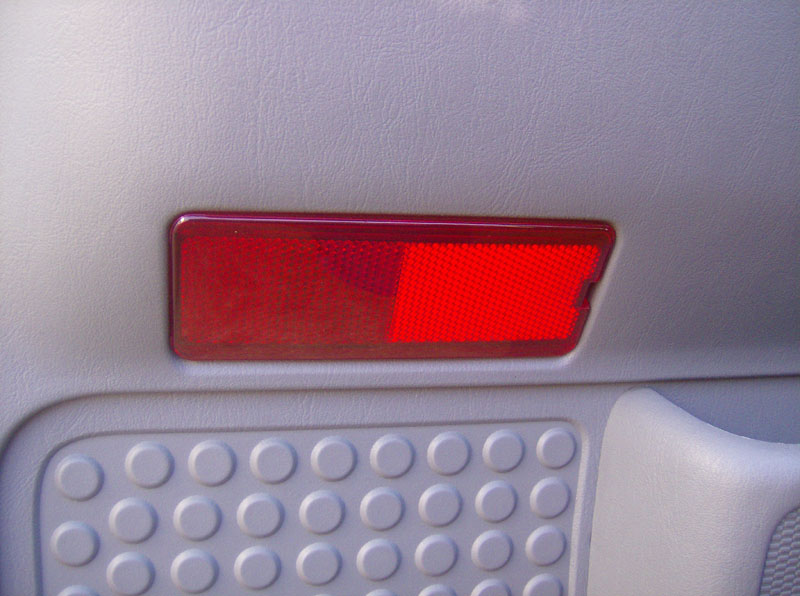
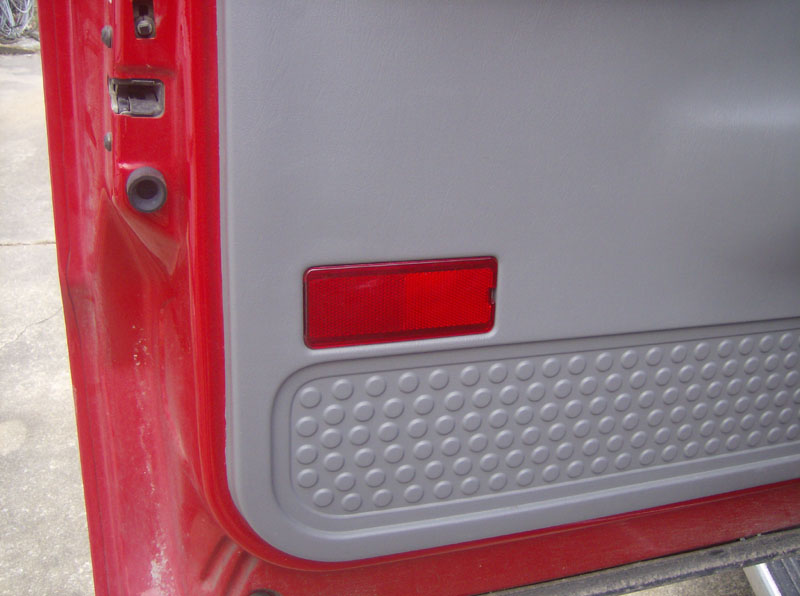
Sometime around the 2002-2003 model year, Ford decided to get rid of the courtesy lights in the doors and replace them with a solid red reflector. However, the cutout for the sockets are still under the reflector on the front doors. So, all it takes to get them back is a bulb, socket, and some simple wiring to the appropriate place. I decided to do this, and add courtesy lights to the rear doors as well.
The wire that you will tap into to power these lights is the BLACK/BLUE wire and it is most easily accessed under the door sill plate. This is detailed below.
TOOLS & PARTS I USED
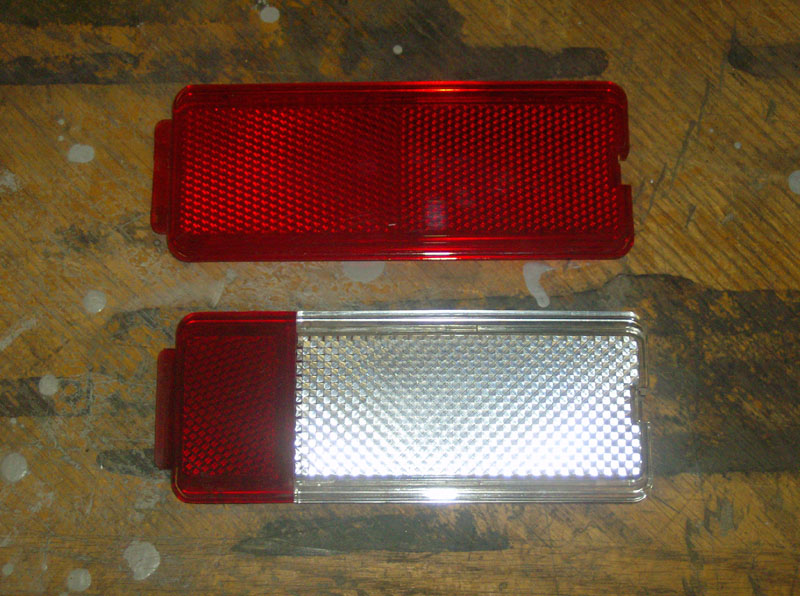
- Red/clear lenses, Ford part number 1C3Z13731AA (x4)
- Wedge style super bright LED bulb, superbrightleds.com part number WLED-W4 (x2)
- 5mm square super bright LEDs, superbrightleds.com part number HF5-W5590 (x4)
- Blank prototyping board, radio shack part number 276-150
- 510 ohm resistors, digikey part number 510QBK-ND (x4)
- Wedge style bulb sockets (x2)
- Flat screwdriver
- 1/4 drive ratchet, 4" extension
- 5.5mm and 7mm sockets
- Needlenose pliers
- Wire cutters
- Crimp tool
- Soldering iron & solder
- Dremel tool with cutting disc
- Heat shrink tubing
- Various lengths & colors of ~18AWG wiring
- Cable ties
- Various crimp terminals
- Electrical tape
PROCEDURE
I've read that most folks go to NAPA and get bulbs and sockets for a license plate lamp or similar. I happened to have a couple marker lights from an 80's model Ford Ranger laying around and they fit really well in the cutout, so I used those.
I also bought the red/clear lenses from FTE/PARTS-GUY on the Ford Truck Enthusiasts Forum. They are part number 1C3Z13731AA and were standard equipment on the earlier model Super Duty's.
** UPDATE ** A few years after I added these lights to my truck, Ford discontinued the red/white lens and now only offers the solid red lens.
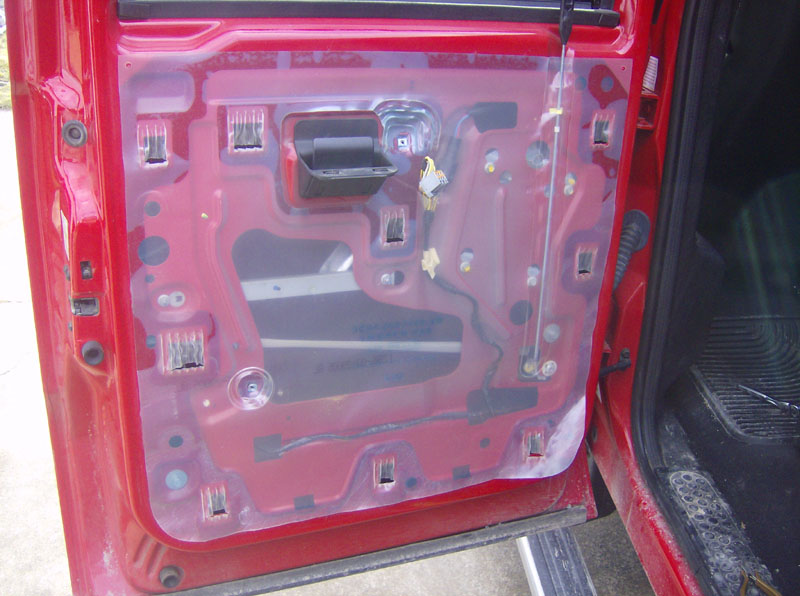
Start by removing the door panel. First remove the black cover up near the mirror area.
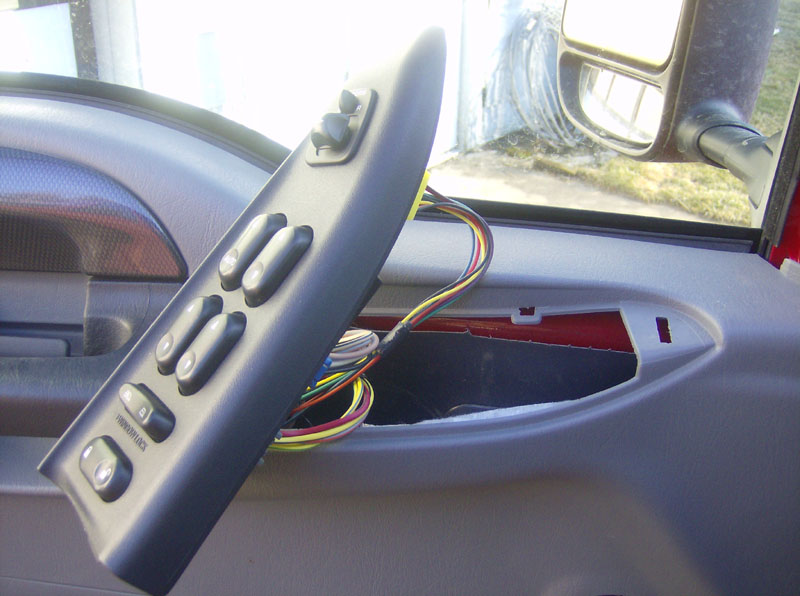
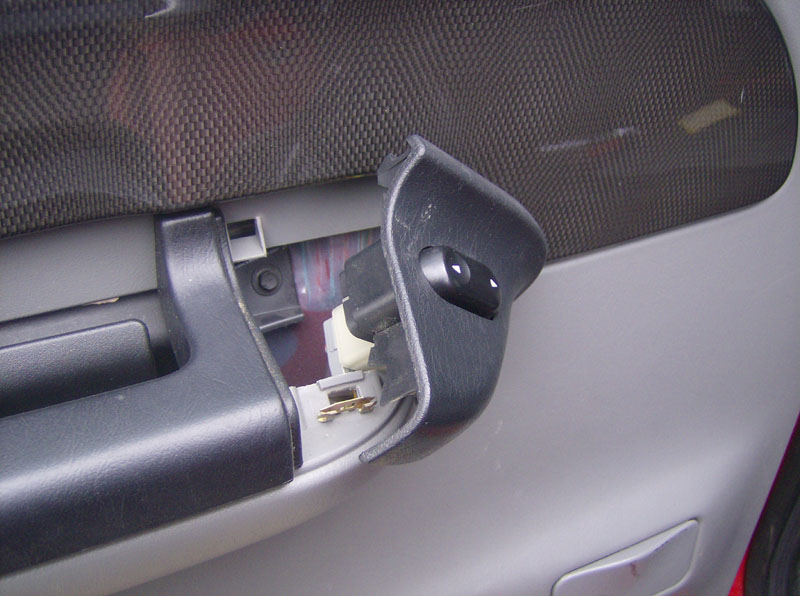
Next, pop the door lock/window switch panel up out of the way and unplug the plugs. Then
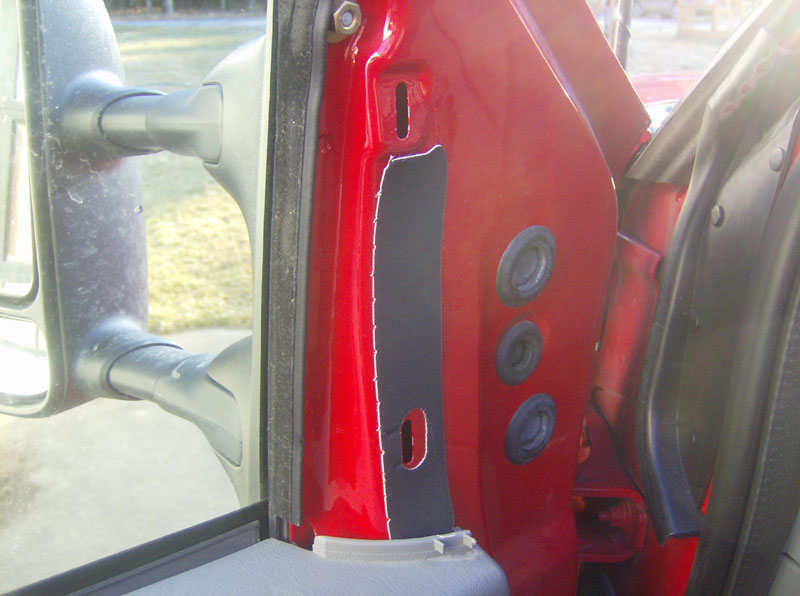
remove the bolt that was behind this panel, using a 7mm socket.
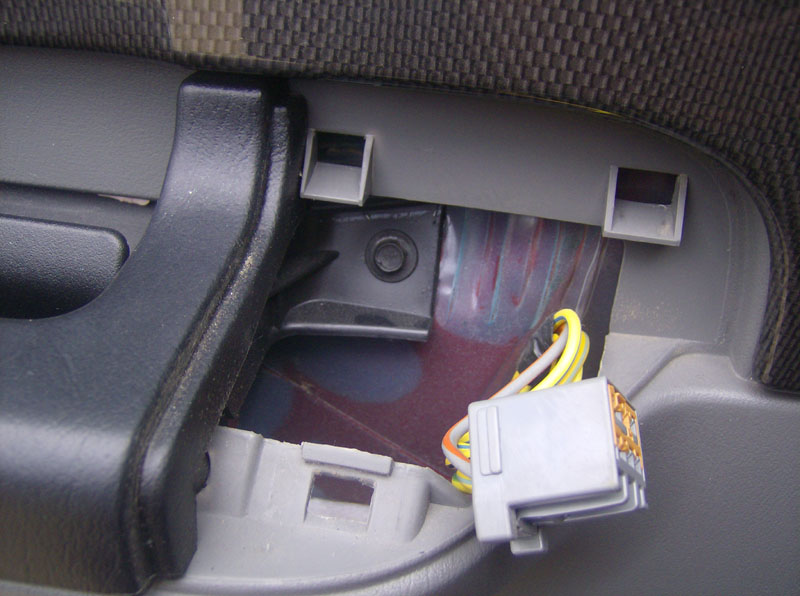
Next, remove the red lens, followed by the other bolt that was behind it with the same 7mm socket.
Now, the door panel can be removed by simply lifting up on it and pulling it away from the door.
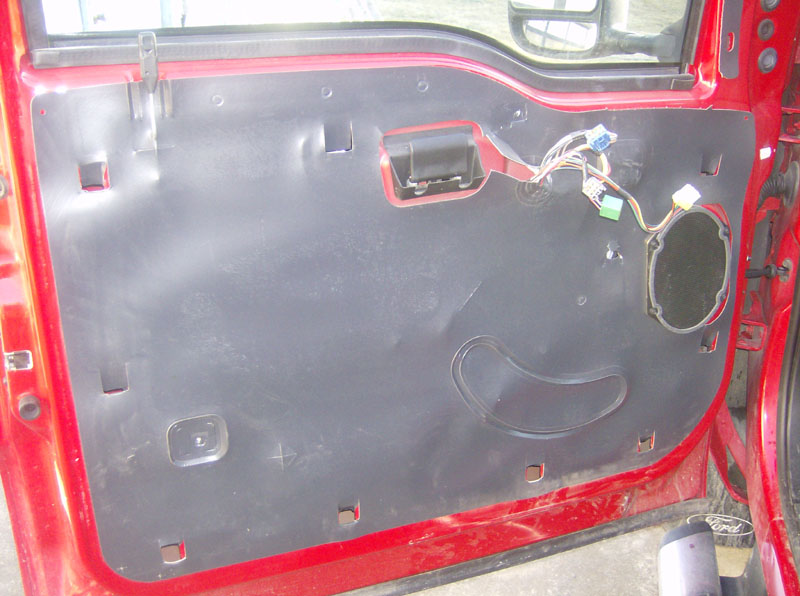
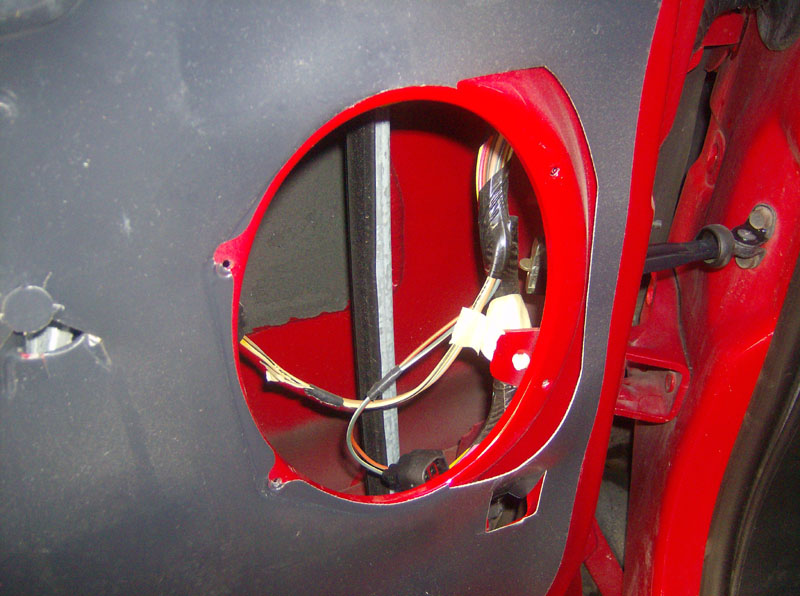
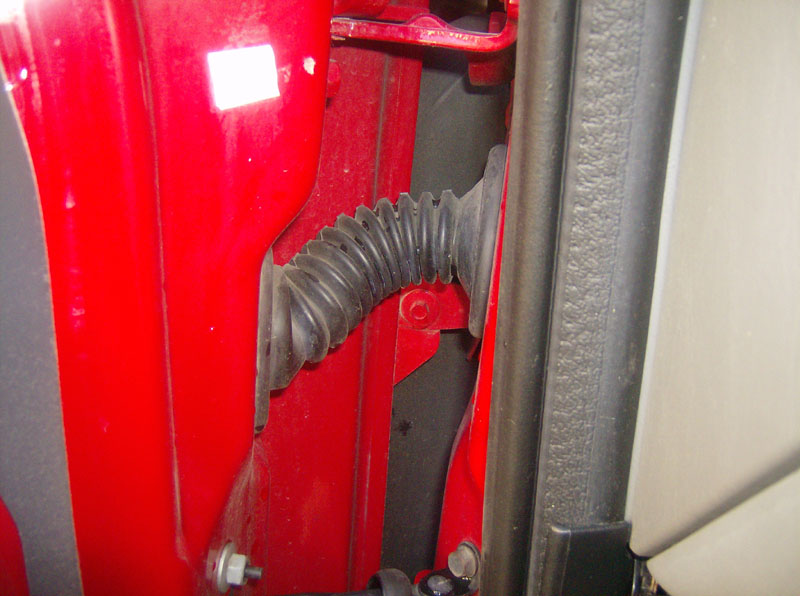
Next step is to remove the speaker (four 5.5mm bolts) from the door. This is to allow better access for running the wires though the rubber "conduit" between the door and the cab.
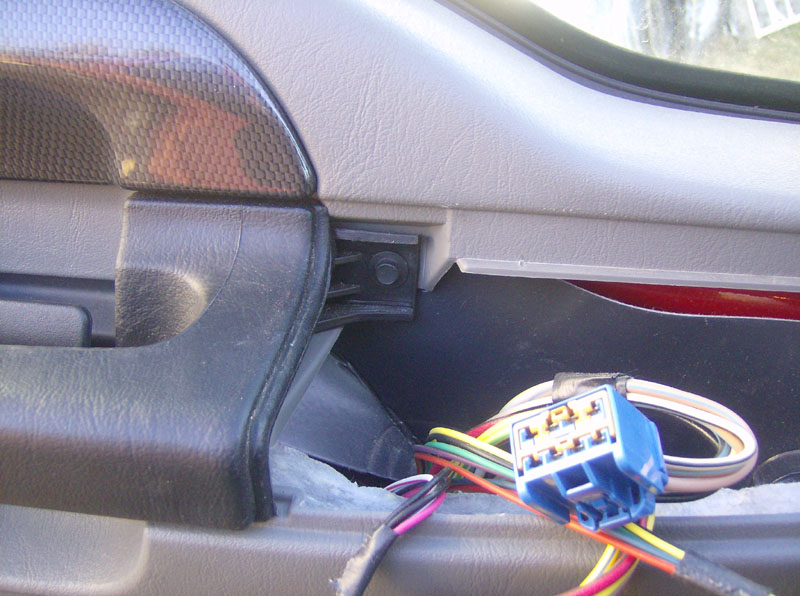
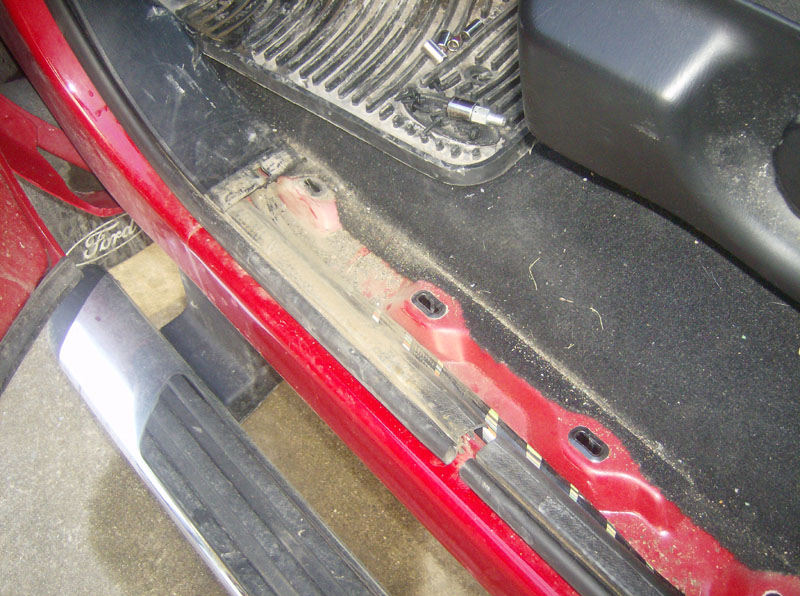
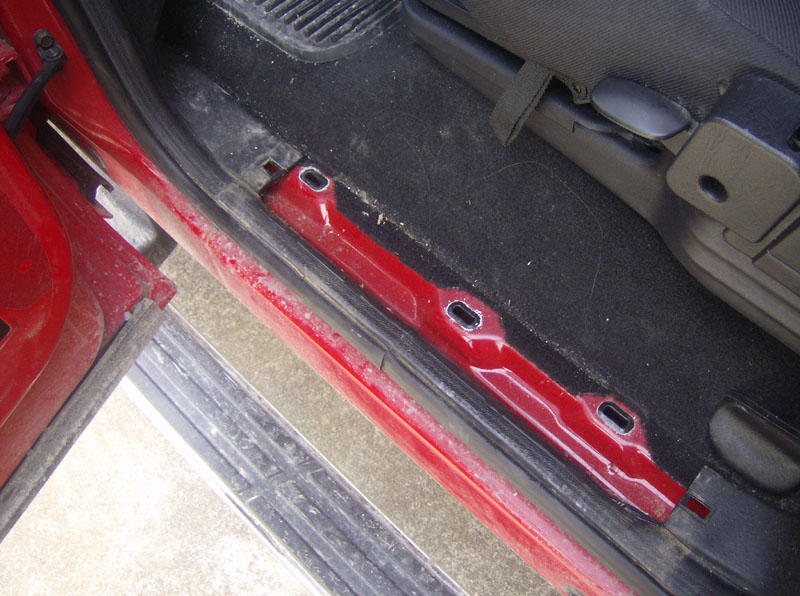
Next remove the sill plate by simply lifting up on it.
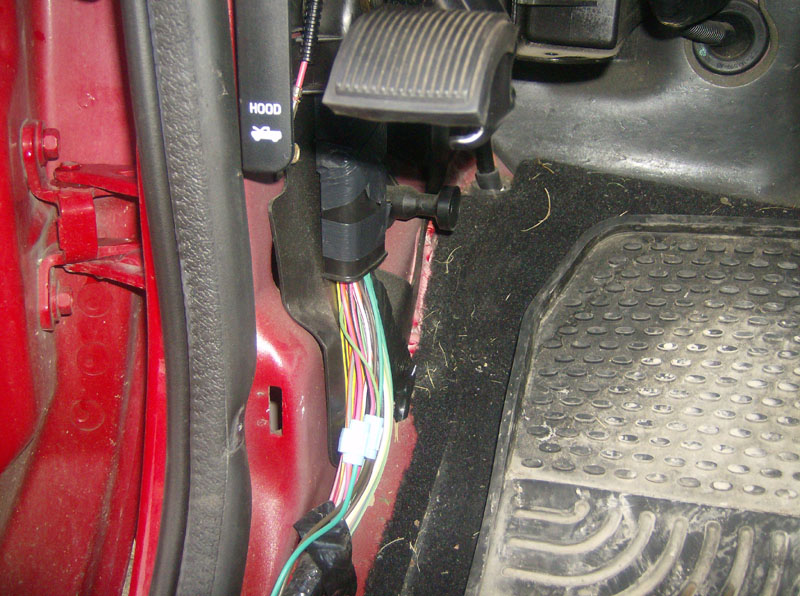
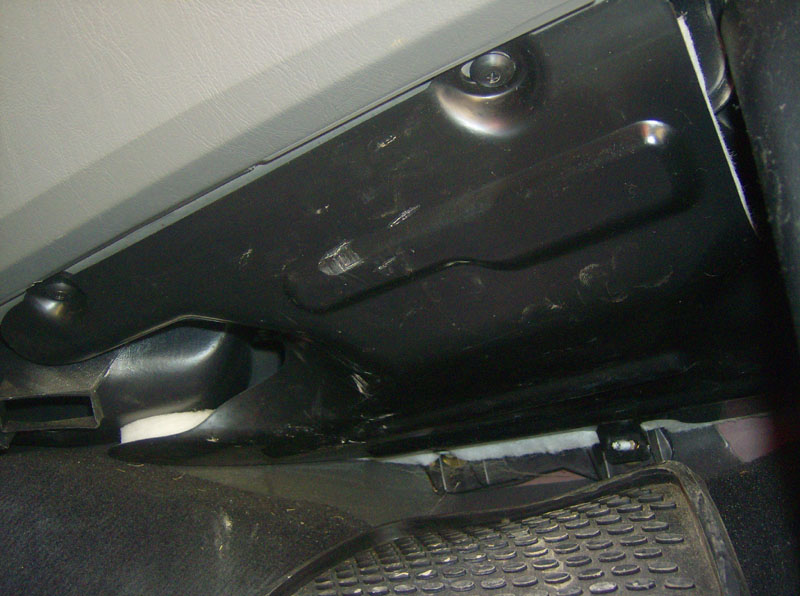
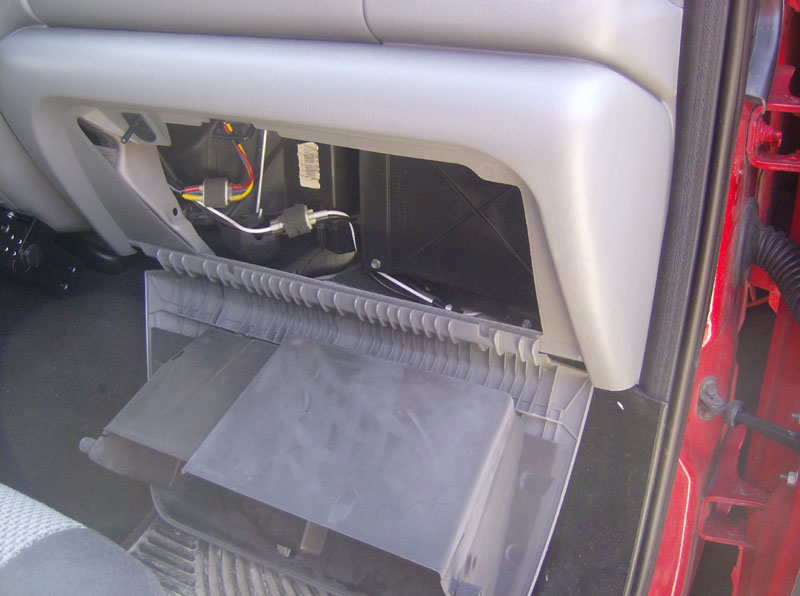
Next remove the kick panel by pulling it toward the brake pedal to remove the trim clip, then pull it towards yourself to free the two clips holding it to the cab.
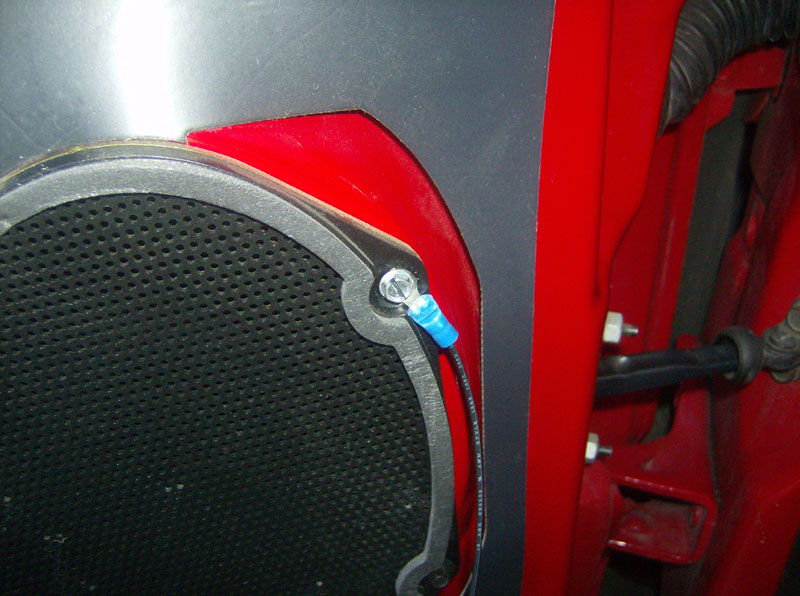
Finally, its time to run the wiring from the door back into the cab. I only ran one wire back into the cab since I picked up a ground from one of the speaker holes.
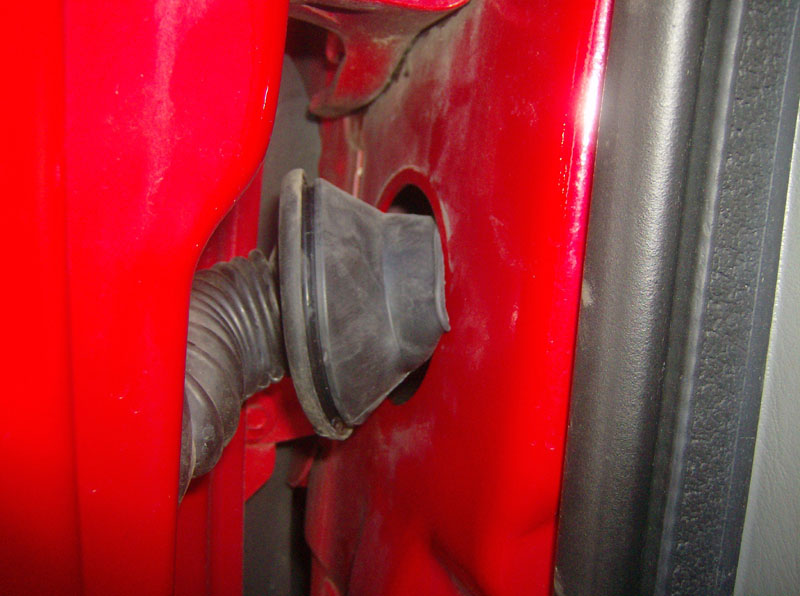
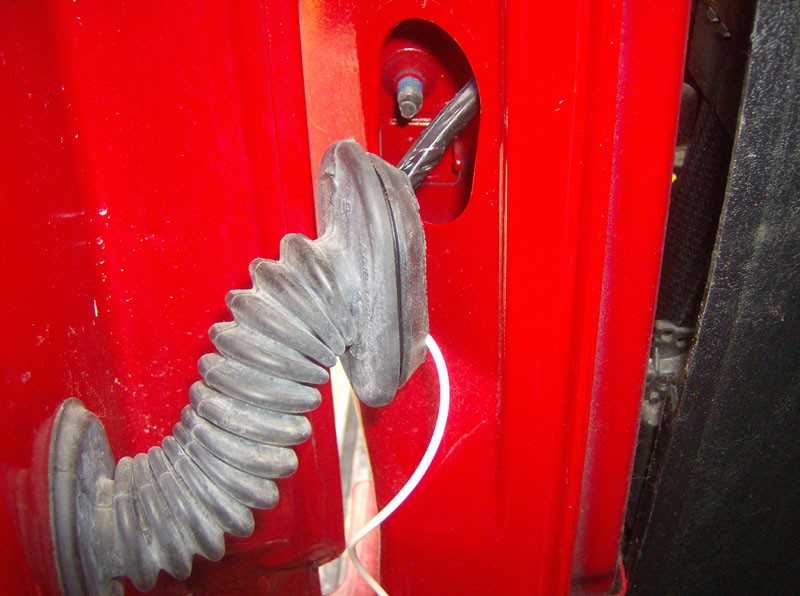
To get the wire through the rubber "conduit" I had to pry it away on the cab-side. I used a long cable tie as a "pull rope" to pull the wire through.
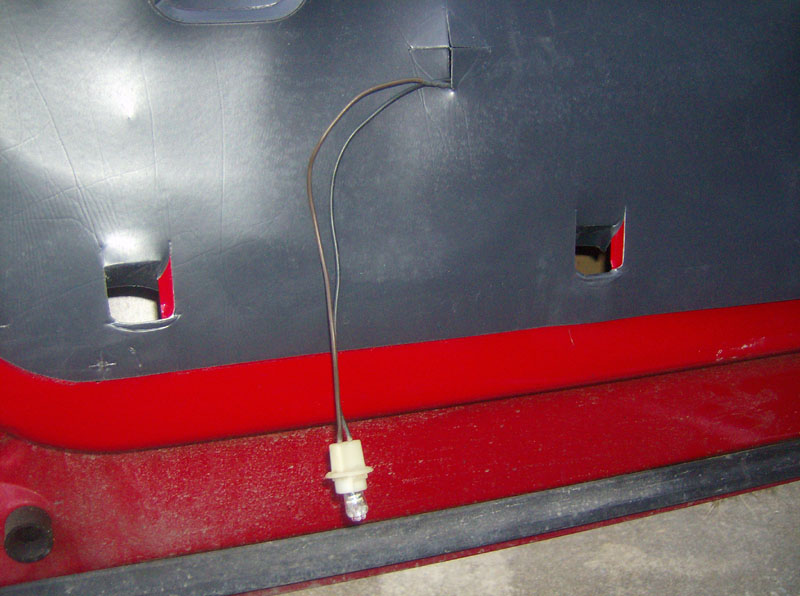
Here's where the new socket & bulb poke through, note the existing "X" cut into the sheet. Be sure to secure the wiring so that it cannot move around in there and end up getting snagged in the window tracks or door lock mechanism.
Next run the wire down to the sill plate area and where it will eventually tap into the black/blue wire. Since I'm installing courtesy lights in the rear doors as well, I'll wait until I have both wires ran, to tap into this wire.
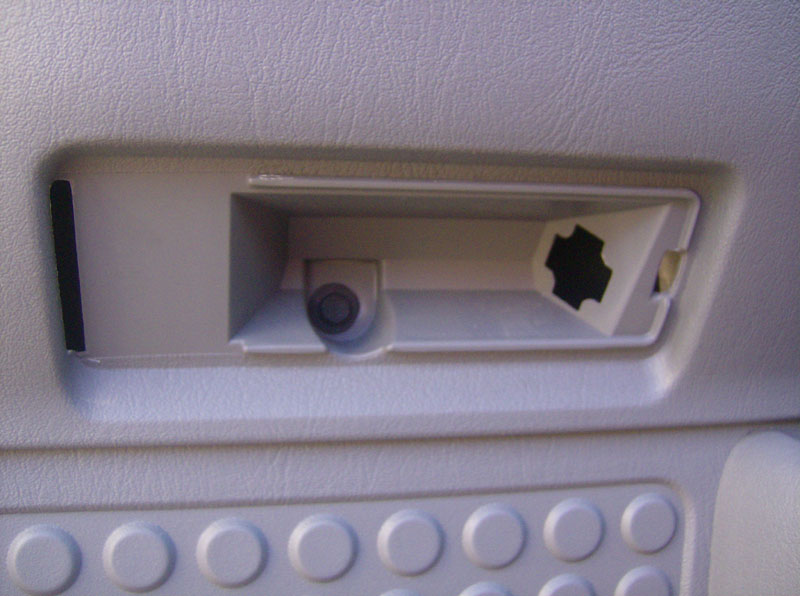
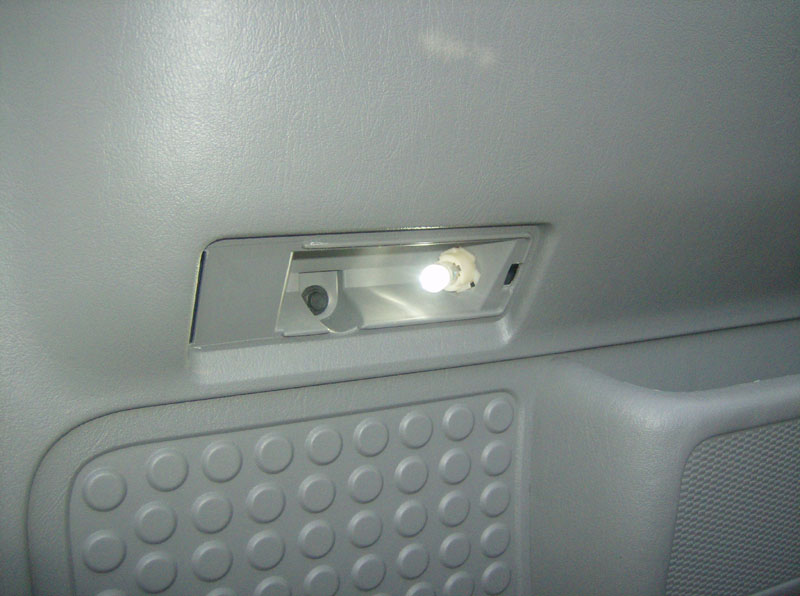
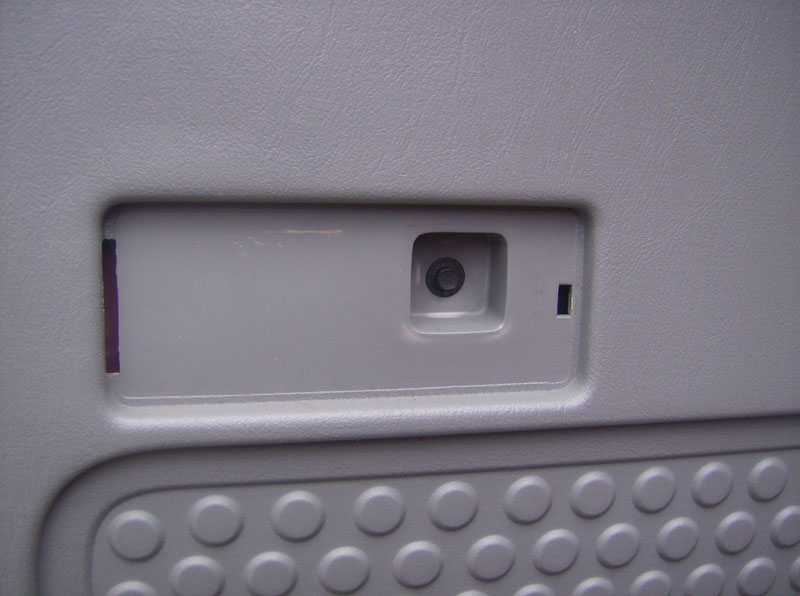
Next, reinstall the door panel in the reverse order it was removed. Only this time, be sure to install the courtesy lamp socket into the door panel! I took this pic after I was finished, so its lit up even though we haven't connected any wires yet!
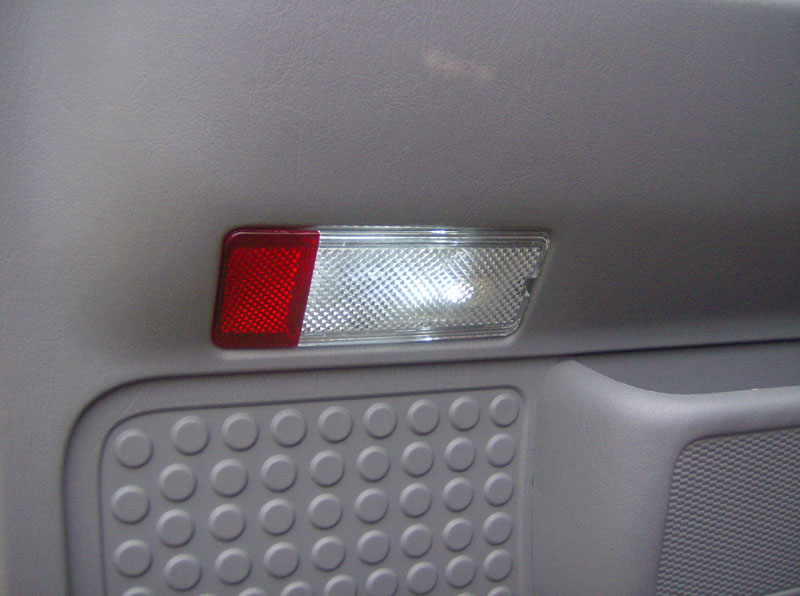
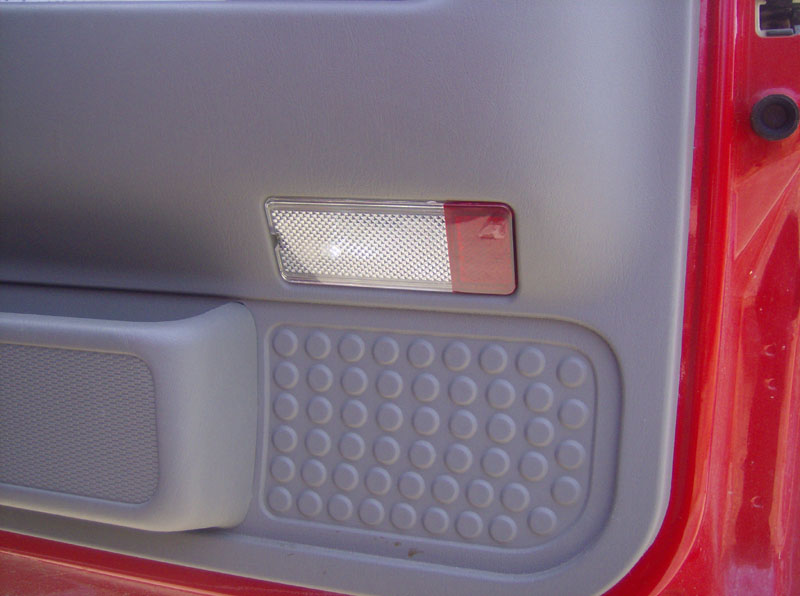
Now install the new red/clear lens and the driver's door is done. This pic was also taken after I was finished so its lit up (no flash).
Next, reinstall the kick panel and its trim clip.
Now its time to do the same thing in the rear door.
First, pop out the switch panel and unplug the wiring, and remove the bolt that was behind it with the 7mm socket.
Then remove the red lens followed by the bolt that is behind it.
Next remove the door panel the same way you did the front one.
Next, remove the rear sill plate by pulling it up. Then loosen the pillar trim by removing the trim clip and prying it out, just enough to pass the wire through to the front sill plate area.
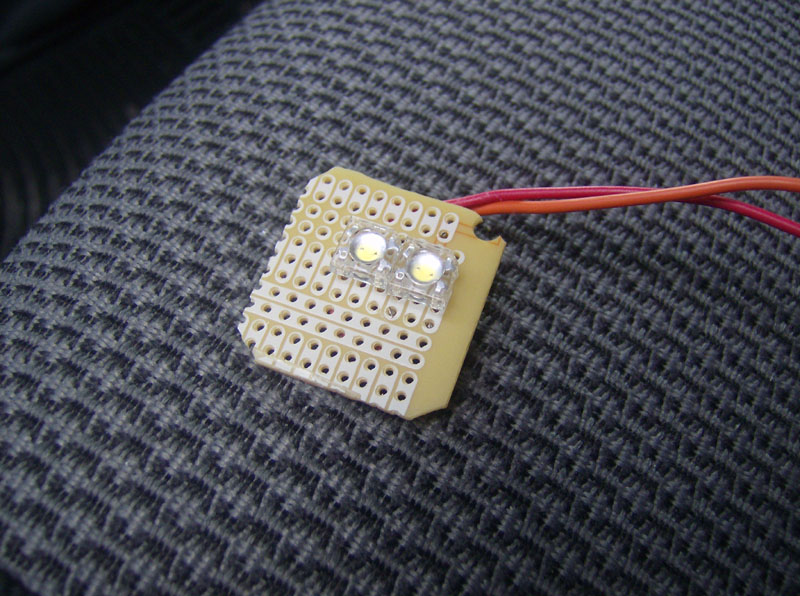
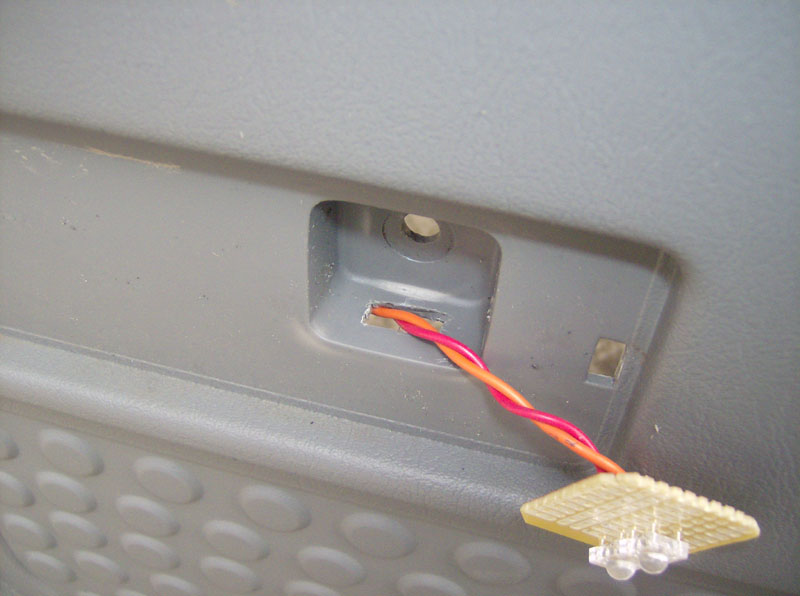
The rear door panels were not intended to have illumination behind the lenses. Since there is minimal room behind the lens, I decided to use two 5mm super bright LEDs on a piece of circuit board. This provides a thin, bright light source. I used 510 ohm current limiting resistors in series with the two LEDs.
Next run the "hot" wire (I connected the ground under one of the screws on the door) from the door into the cab, down the pillar, and up to the front sill plate with the other wire. Similar to the front door, I had to pry the "conduit" away at the cab-side.
To get the small circuit board to the outside of the door panel, I used my Dremel tool to cut a notch in the plastic to get the wiring through. I put a few layers of electrical tape on the back side of the circuit board to prevent anything from shorting out on the door panel screw.
Next, reinstall the rear door panel in the reverse order it was removed. Snap the pillar trim back into place along with the rear sill plate. Then, tap the two new wires into the black/blue wire under the front sill plate. Also, reinstall the front sill plate.
Next, I trimmed the circuit board until it was a nice press-fit into the square opening. I angled it down so that the lights would shine toward the ground.
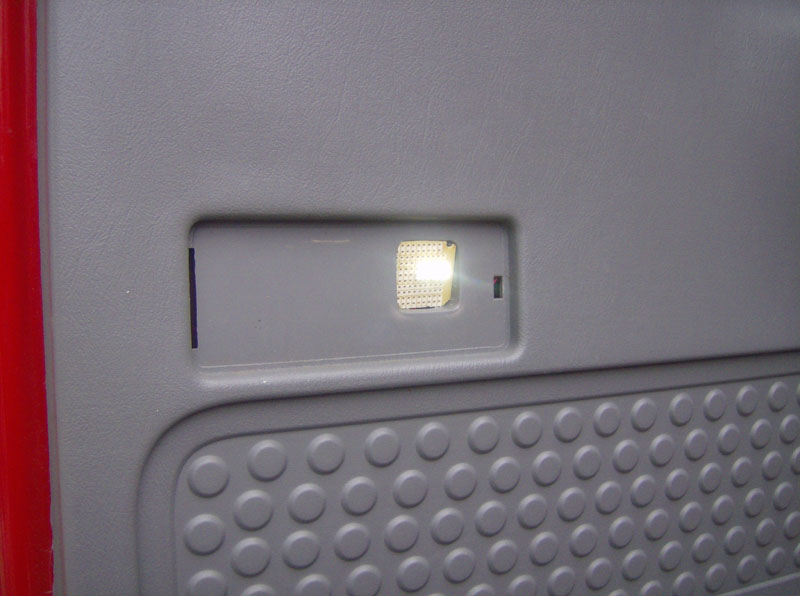
Install the lens and the rear door is done!

That's it for the driver's side. The passenger side is very similar to the driver's side, with the following exceptions...
Before you can remove the passenger side kick panel, you must first remove a plastic trim piece below the glove box. There are two plastic screw/plugs that hold it up. Just remove those and pull it toward you.
Also, I found it helped to drop the glovebox down for routing the wires.
Here's a shot of the passenger front door finished.
Questions or Comments? Email jmray@frontiernet.net