Ford Super Duty 4x4 Stereo Upgrade
2004 F250 4x4 XLT Sport
** UPDATE 09/03/09 ** PIE auxilary input adapter!
Click Here for a PDF version of this article
Ever since I bought my truck I had planned to upgrade the stereo unit. I'm pretty sure everything below holds true for all 1999-2004 Super Duty pickups, but before buying a new unit its always best to pull yours and verify the mounting type, plugs, etc. I know Ford used this stereo type back in 1999, because I gave my original stereo unit to my Dad to put in a 1999 Light Duty F250 and it was a direct replacement for his AM/FM unit.
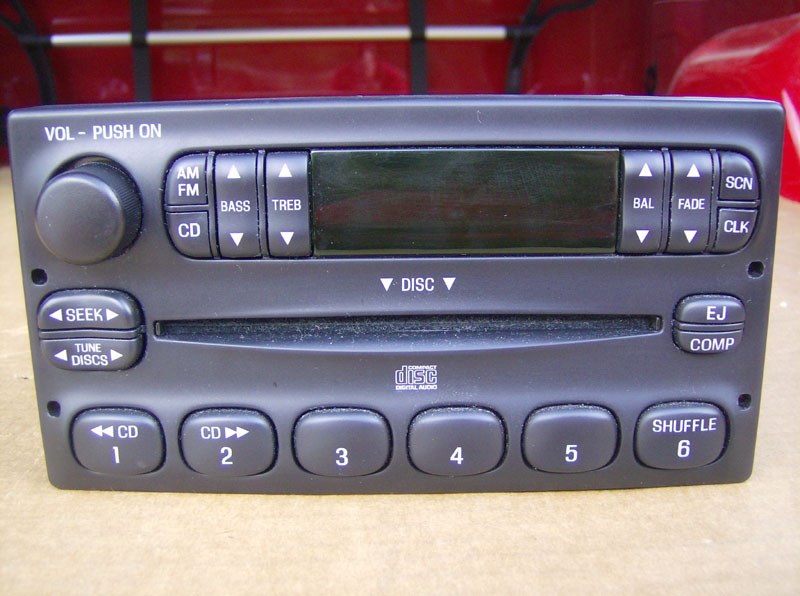
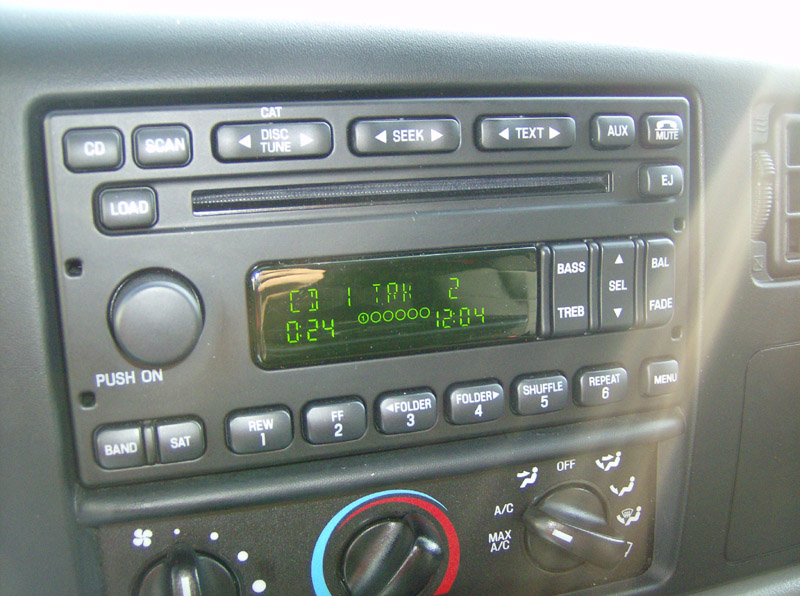
Here's the original stereo from my truck, just the typical AM/FM single CD unit.
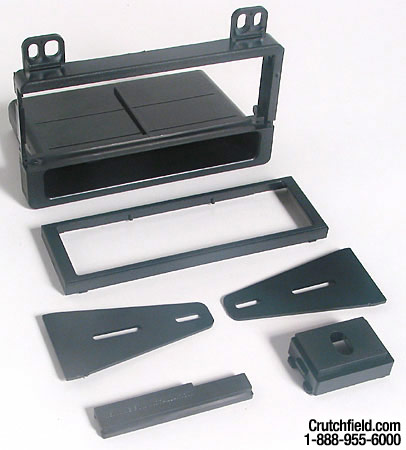
These generation Ford stereos are double-DIN units so the aftermarket options aren't so great. The most common option is to get a double DIN install kit which allows you to mount a single DIN unit at the top and use the remaining height of the double DIN space as a storage pocket. Here's an example of this kit from Crutchfield.
I didn't particularly like this option so I started researching the stock Ford stereos from other vehicles. I knew there were better options out there because my Dad & sister both have in dash 6-disc changers in their 2002 Explorers. So, I started researching whether or not I could get one of these units and use it as a direct replacement for mine.
I found that there are a LOT of different versions of stereos in the newer (1999-2004, and some 2005-2008) Fords that appear to be a direct fit. However, there are different stereo types, mounting types, and connector types to watch out for.
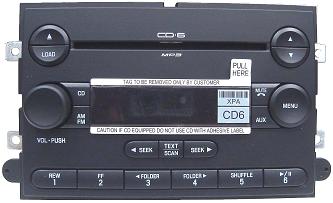
First, the stereo types. Starting around 2005, most Ford vehicles started using the larger (taller) stereo units similar to the one on the left, below. The one on the right is the typical 1999-2004 size, that will fit.
Next, the mounting type. In order for the stereo to be a direct replacement, it has to have two release holes on each side. If the release holes aren't there, then it uses brackets at the top & bottom to mount and will not be a direct replacement. You can see these holes in the above pic on the right.
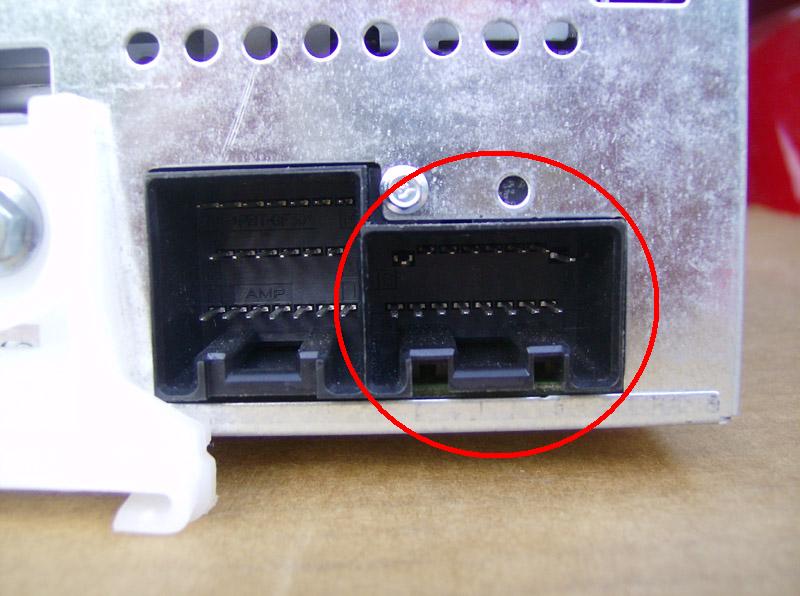
Next, the connector types. From what I've read on the internet, the typical 1999-2004 connectors are black and are referred to as "world plugs". The newer type stereos use "Audiophile" or "phase 2" connectors which are gray. It is possible to find an earlier size stereo with the release holes, and phase 2 connectors so that's something to watch for. However, there are adapter harnesses available that will make it work.
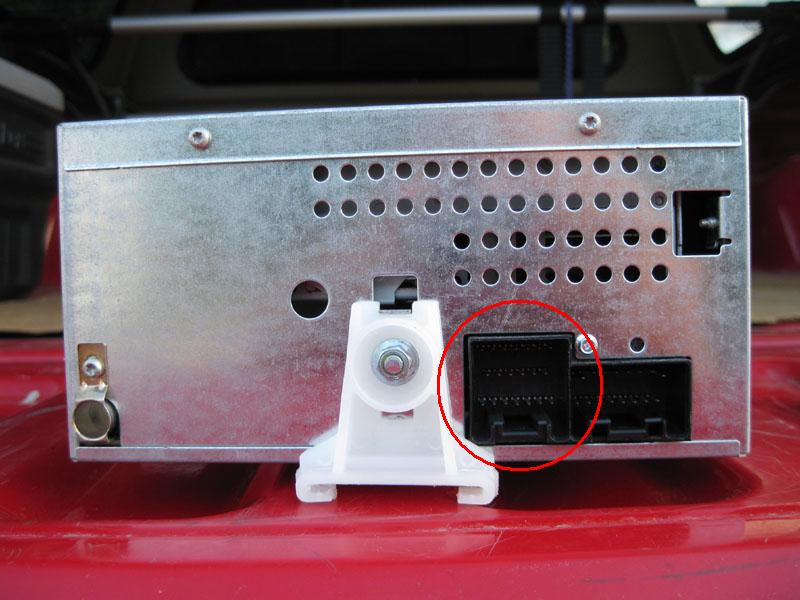
Here's a pic of the "world plugs" like my stereo has. The one circled in red is the only one used in my truck. I'm not sure what the other plug is. Maybe for the satellite radio input....?
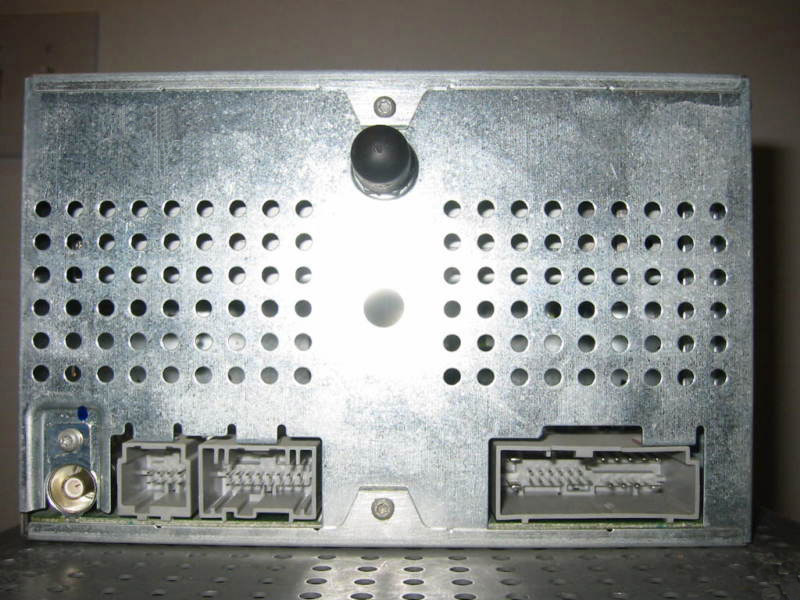
Here's a pic of the phase 2 or Audiophile connectors which will not (without an adapter harness) work.
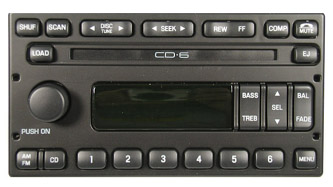
So, once I found which size, mounting type, and connector type I needed, I narrowed my search to find the features that I wanted. I was shooting for a 6-disc in dash changer that plays MP3s. I watched ebay for quite a while before finding, bidding on, and winning the one I wanted. Mine is part number 6L8T-18C815-DD and thanks to some great info from DavidB on the Ford Truck Enthusiasts Forum I now know that this radio is from a 2006 Ford Escape. So, I went to the Ford-Fleet site and downloaded the owner's manual for an '06 Escape, which has all the info for operating the radio.
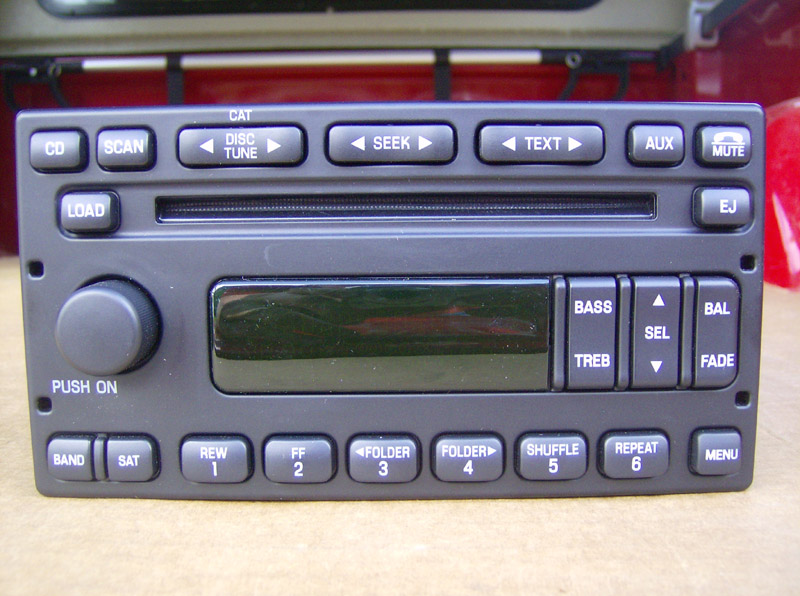
Not all auctions have good descriptions of what the unit really is. One way to easily distinguish a single-CD from a 6-disc changer is that the button to the left of the CD slot will have "LOAD" on it, on the CD6 models. On the single CD units, that button will just have "CD" on it. Some of the CD6 units actually have "CD6" written on the face somewhere, but not all of them.
Similarly, one way to tell whether or not a unit plays MP3s is to see if there are any buttons that have "FOLDER" on them.
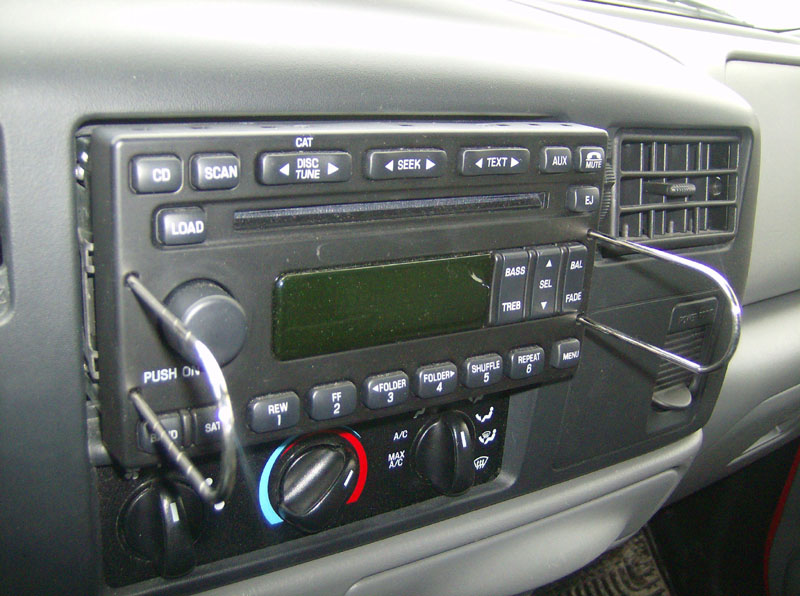
So, the install was as easy as I'd hoped. Used the U-shaped removal tools to remove the old one. NOTE -- just a technicality, but the picture below is actually of my "new" stereo. Since posting the write-up, I've received a few questions about how to use the removal tools, so I threw this picture in there for reference.
Then I plugged in the antenna cable and stereo harness in the new one, pushed it into the slot, and clipped it into place.
** UPDATE 09/03/09 ** P.I.E adapter for auxilary input.
While traveling recently, my little girl was watching her DVD player and it was raining. All the rain on the roof made it so she couldn't hear it, even with volume all the way up. Wouldn't it be nice to pipe that audio through the truck speakers?
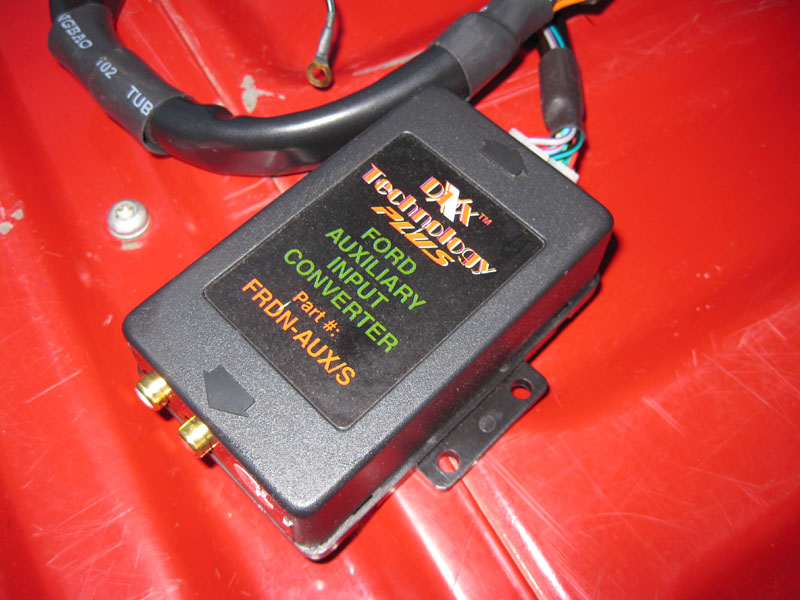
After some research I found that the FRDN-AUX/S would be sufficient to connect to the unused connector on the back of my stereo and give me an auxilary input. This device allowed me to use the "SAT" input as an auxilary input. Here's the PIE adapter I bought.
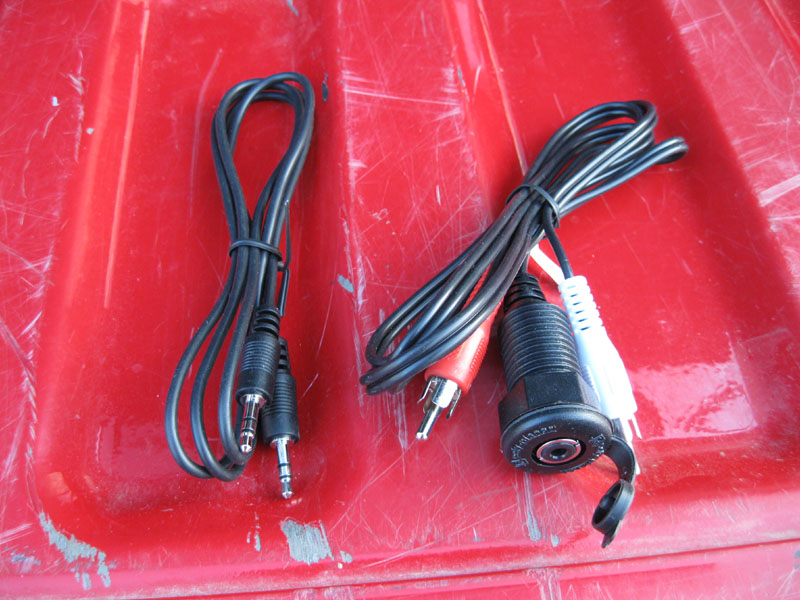
As you can see, this box has two RCA audio jacks on it for the input. A 3.5mm audio jack to RCA adapter cable would work well for this. However, I didn't want a cord dangling all the time, so I found the "Poly Planar IC-3.5M MP3 Adapter Cable" that has a 3.5mm panel mount audio jack. Then just connect the audio device, with a cable that has 3.5mm plugs on both ends, included with the kit.
After temporarily connecting everything up to verify it all works, I began the actual installation.
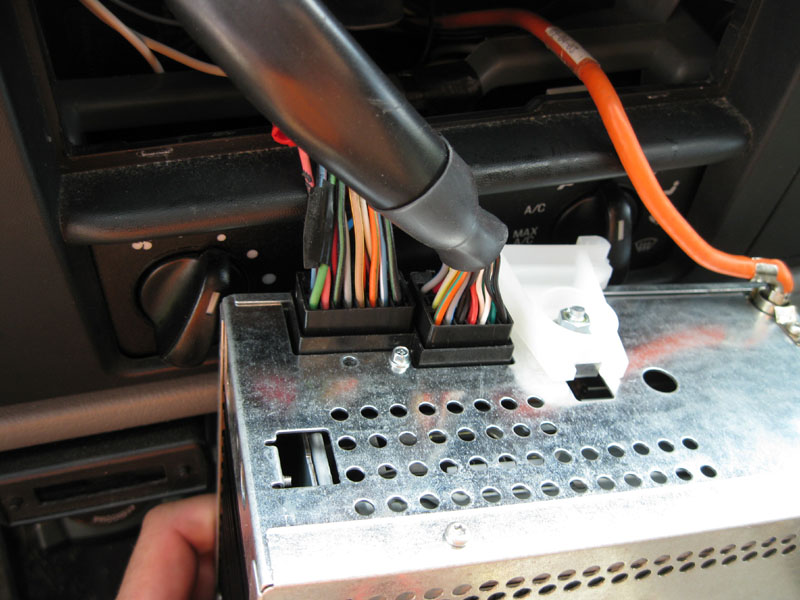
First, remove the stereo with the typical U-shaped tools. Disconnect the connector and the antenna on the back, and set it to the side. This picture shows the connector on the back where the PIE adapter will connect.
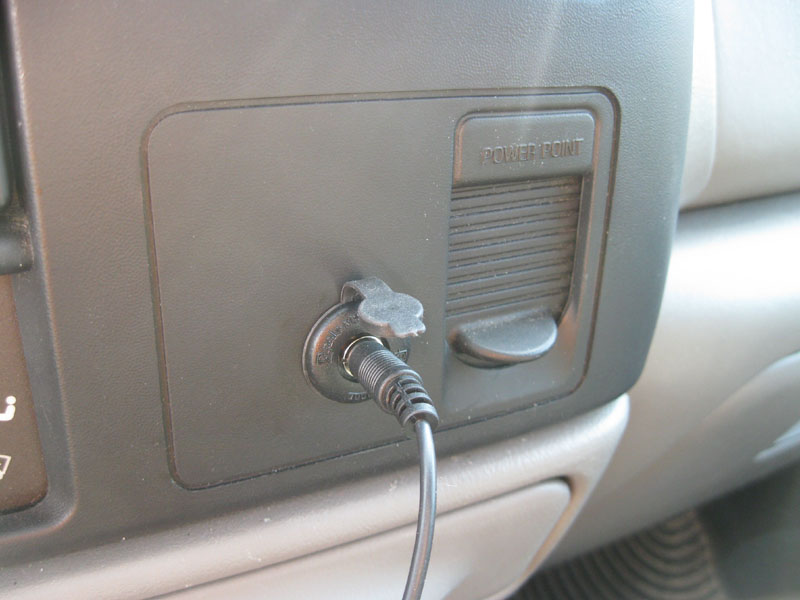
The next thing to do was to decide where to mount the 3.5mm jack. Since my truck doesn't have the airbag disable switch, I chose to mount it beside the power point. There was plenty of clearance behind the panel where the disable switch would have been.
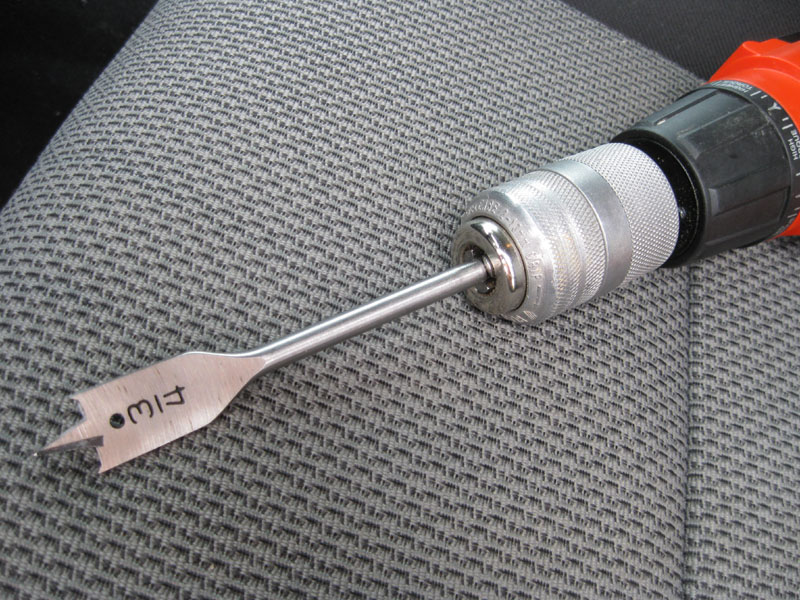
Next, I used a 3/4" wood bit to drill the hole required. Measure 10 times, drill once!
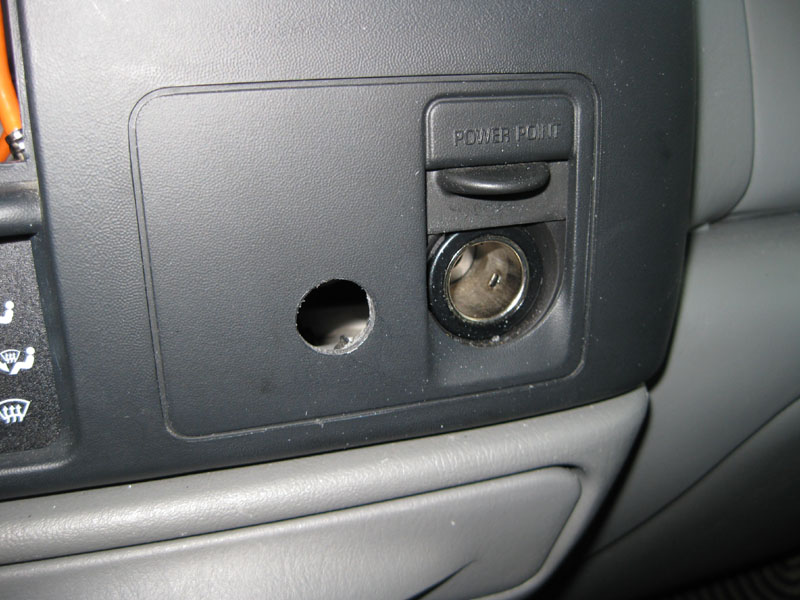
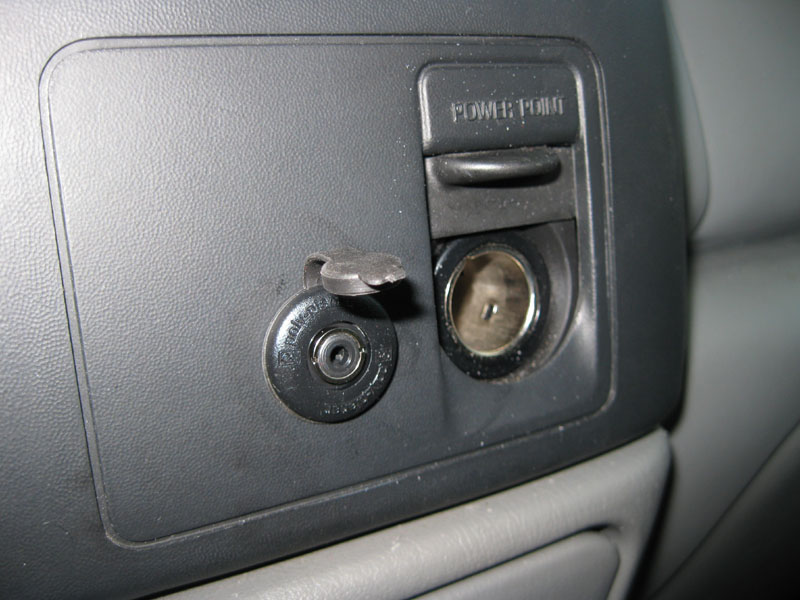
Then install the jack.
Next, decide how to mount the PIE adapter behind the radio. I found that it would fit nicely below the ductwork. I used a couple cable ties to attach it to two tabs I found with nothing attached to them. Then connect the RCA plugs to it.

Next, connect the power and ground wires of the PIE adapter appropriately.
** UPDATE 07/07/10 ** The PIE adapter failed and I returned it for a replacement. The replacement works so at least the problem wasn't in my stereo. As a measure of safety for the new unit, I decided to power it through a switch, so that its only on when I need it. Before, it was powered up constantly and I only used it a few times. I don't think that contributed to the failure, but it won't hurt to put it on a switch. More info on the switch install in my Auxiliary Switch Install writeup here.
Finally, plug the PIE connector, the original connector, and the antenna back into the stereo and reinstall it into the dash.
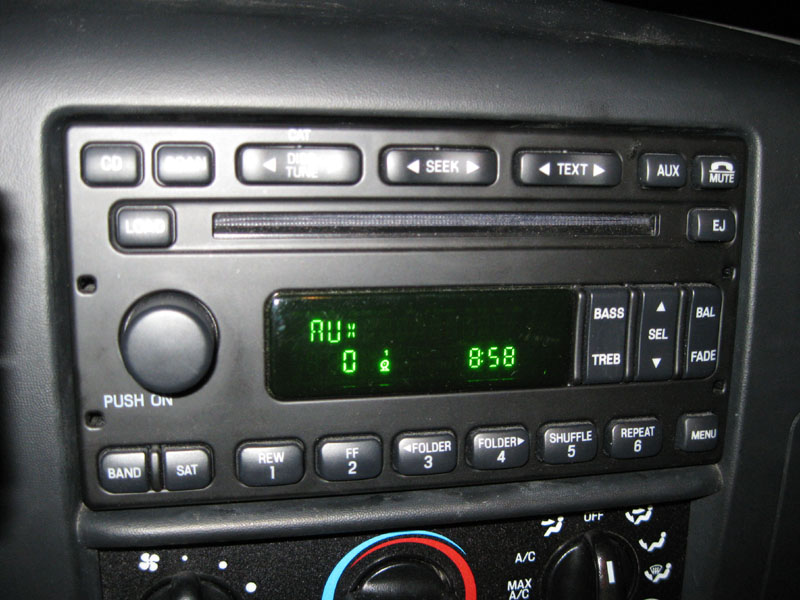
Now, connect up any auxilary audio device (DVD player, MP3 player, IPOD, etc) to the jack on the dash and press the "SAT" button, and see it work!
Questions or Comments? Email jmray@frontiernet.net